Managing Labs
Creating a New Lab
Here you can find information about creating a new lab, including the necessary steps and best practices.
This is a feature that only Admin can access. If you are not an Admin, you will not be able to create a new lab.
Step 1: Go to Labs Management Page
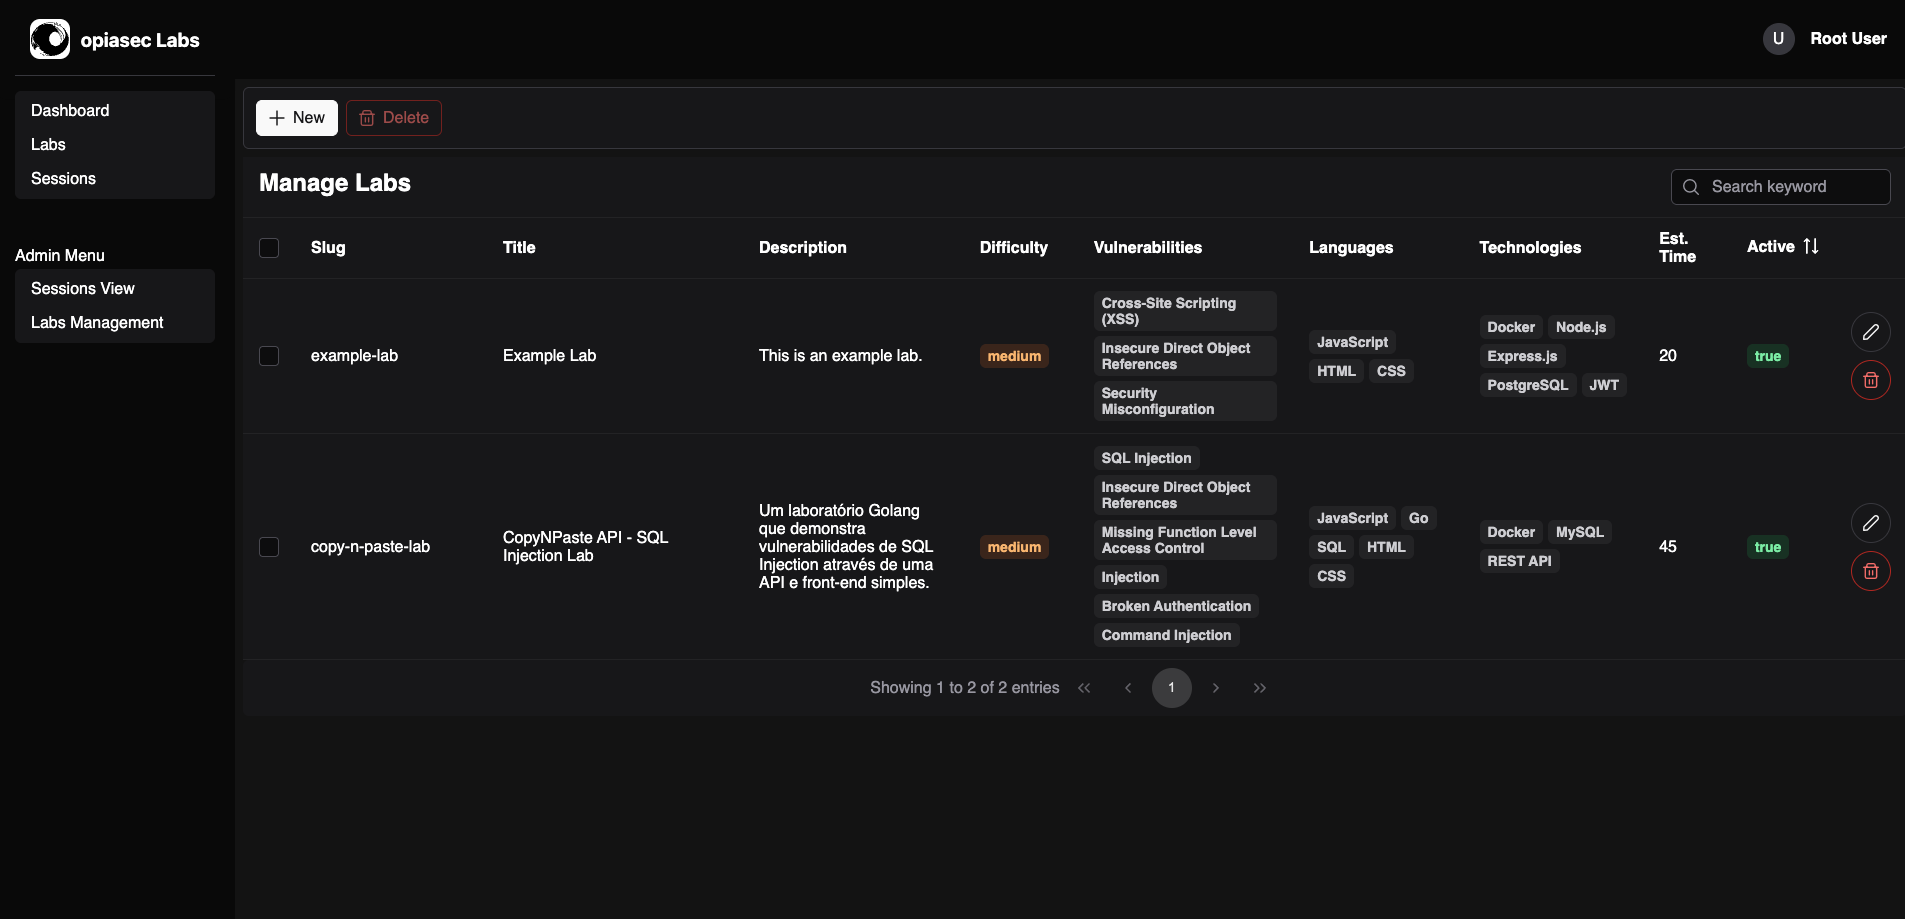
- Navigate to the Labs Management page in the opiasec Labs application.
Step 2: Fill in Lab Details
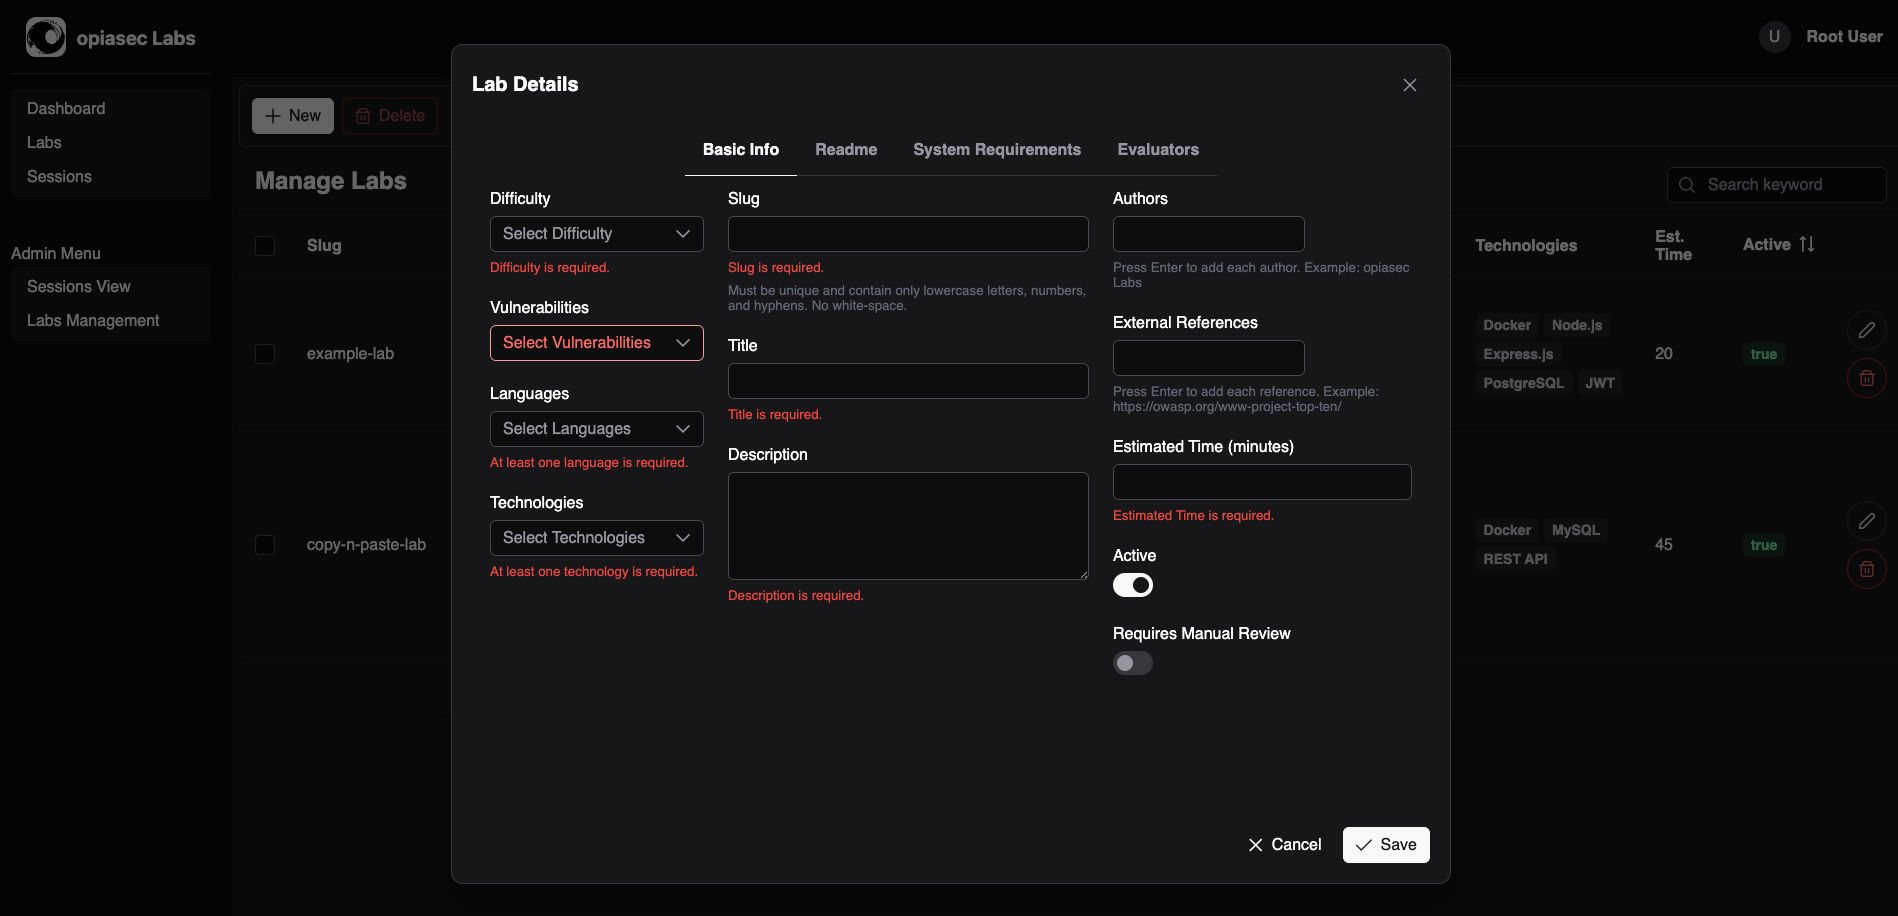
- Click on the "Create Lab" button.
- Fill in the required details for the lab:
-
Basic Info:
- Difficulty: Select the difficulty level of the lab (e.g., Easy, Medium, Hard).
- Vulnerability: Choose one or more vulnerabilities that the lab will focus on (e.g., SQL Injection, Cross-Site Scripting).
- Languages: Choose one or more programming languages that the lab will use (e.g., Python, JavaScript).
- Technologies: Choose one or more technologies that the lab will use (e.g., Flask, Express).
- Slug: A unique identifier for the lab, used in the URL.
- Title: The name of the lab.
- Description: A brief description of the lab, explaining what it is about and what users will learn.
- Authors: Choose one or more authors for the lab.
- External References: Add any external references that are relevant to the lab (e.g., CWEs URLs, documentation links etc.).
- Estimated Time: The estimated time it will take to complete the lab.
- Active: Check this box to make the lab active and available to users.
- Requires Manual Review: Check this box if the lab requires manual review by instructors or peers.
-
Readme:
- Readme: A detailed description of the lab, including instructions, hints, and any other relevant information. This will be displayed to users when they start the lab.
infoThe Readme is written in Markdown format, allowing you to use formatting, links, images, and other Markdown features to enhance the lab's instructions.
All images links must be PUBLICLY accessible, as they will be displayed in the lab's Readme.
-
System Requirements:
- Container Image: The Docker image that will be used to run the lab environment.
- Git URL: The URL of the Git repository that contains the lab code.*
- Code Configurations: Git branch and git path where the lab code is located.**
- Environment Variables: Any environment variables that need to be set for the lab environment. Must be in the format
KEY=VALUE. - Lab Evaluators: Select the evaluators that will be used to assess the lab submissions. You can choose from existing evaluators or create new ones.
info*The Git URL must be in the format
github.com/opiasec/labs.git.**The Git path must be in the format
lab-name, wherelab-nameis the name of the folder in root repository. If the lab code is in the root of the repository, leave it empty. If the lab code is in a subfolder, specify the path relative to the root of the repository, ex:labs/lab-name. -
Evaluators:
- Evaluator Type: Select the evaluators that will be used to assess the lab submissions. You can choose from existing evaluators. Ex.: SAST, Exploit.
- Weight: The weight of the evaluator in the final score of the lab. This is a number between 0 and 100, representing the percentage of the total score that this evaluator contributes.
- Configuration: Any additional configuration required by the evaluator, such as specific rules or parameters. Must be in the format
KEY=VALUE.
infoTo see the available evaluators (and your configurations), check the Evaluators documentation.
-
Step 3: Save the Lab
- After filling in all the details, click on the "Save" button to create the lab.
- The lab will now be listed in the Labs Management page, and you can edit it later if needed.
Editing an Existing Lab
To edit an existing lab, follow these steps:
- Navigate to the Labs Management page in the opiasec Labs application.
- Locate the lab you want to edit in the list of labs.
- Click on the "Edit" button next to the lab.
- Make the necessary changes to the lab details.
- Click on the "Save" button to save your changes.
Deleting a Lab
To delete a lab, follow these steps:
- Navigate to the Labs Management page in the opiasec Labs application.
- Locate the lab you want to delete in the list of labs.
- Click on the "Delete" button next to the lab.
- Confirm the deletion when prompted. The lab will be permanently removed from the system.